はじめに
Vagrantを使った仮想マシンは、開発に大活躍していますが、vagrant addの元になったベースBoxをいろいろといじっていると、現状のBoxをVagrant Boxにしたくなります。
そこで、今回はVagrant上でカスタマイズしたBoxを再パッケージ化する方法について解説します。

2013年11月20日 23時16分

Vagrantを使った仮想マシンは、開発に大活躍していますが、vagrant addの元になったベースBoxをいろいろといじっていると、現状のBoxをVagrant Boxにしたくなります。
そこで、今回はVagrant上でカスタマイズしたBoxを再パッケージ化する方法について解説します。
作業の前提条件は、下記のとおりです。
| ソフトウエア | バージョン |
|---|---|
| OS | TD>Windows 7 Ultimate 32bit |
| Cygwin | Setup Version 2.831 |
| VirtualBox | 4.2.18 r88780 |
| Vagrant | 1.2.7 |
Vagrantには、up/ssh/add/init/halt/list/destoryなどのよく使うコマンドの他に、packageコマンドが利用です。
Vagrant上で、作業中のBoxをBox化するには、このpackageコマンドを使います。
今回は、VirtualBoxの仮想マシンイメージをVagrant用に変換するで作成したBoxをカスタマイズした後、パッケージ化します。
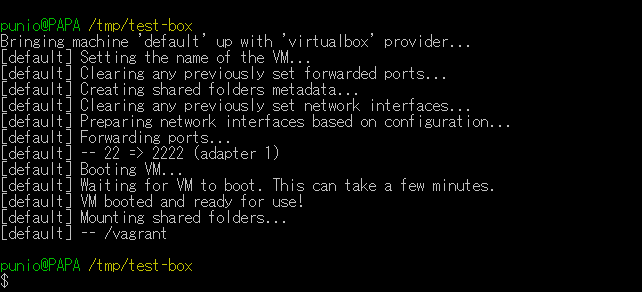
既存のBoxを起動します。
$ cd /tmp/test-box
$ vagrant up
$ vagrant ssh
Bringing machine 'default' up with 'virtualbox' provider...
[default] Setting the name of the VM...
[default] Clearing any previously set forwarded ports...
[default] Creating shared folders metadata...
[default] Clearing any previously set network interfaces...
[default] Preparing network interfaces based on configuration...
[default] Forwarding ports...
[default] -- 22 => 2222 (adapter 1)
[default] Booting VM...
[default] Waiting for VM to boot. This can take a few minutes.
[default] VM booted and ready for use!
[default] Mounting shared folders...
[default] -- /vagrant
今回はテストですので、ホスト名をtest-box2に変更し、Apache Web Serverをインストールします。
$ sudo sed -i -e "s|^HOSTNAME=.*$|HOSTNAME=test-box.vagrantup.local|" /etc/sysconfig/network
$ sudo yum -q -y install httpd
$ sudo sed -i -e "s|^#ServerName.*$|ServerName test-box.vagrantup.local:80|" /etc/httpd/conf/httpd.conf
$ sudo chkconfig httpd on
$ chkconfig httpd --list
$ sudo service httpd start
$ curl -s http://localhost | head -10
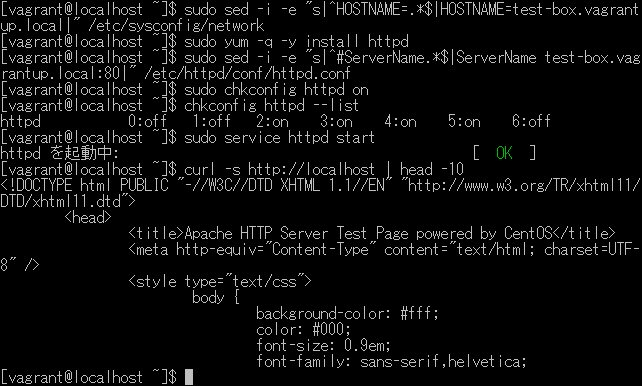
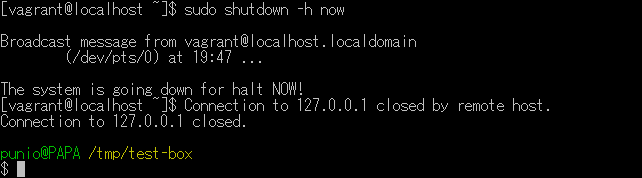
Apacheの起動が確認できましたので、Boxをシャットダウンします。
$ sudo shutdown -h now
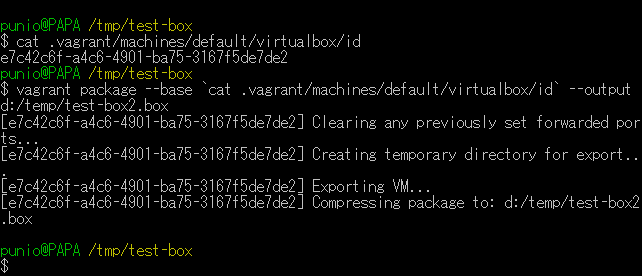
Boxが停止しましたので、カスタム化したBoxをパッケージ化します。
$ vagrant package --base `cat .vagrant/machines/default/virtualbox/id` --output d:/temp/test-box2.box
オプションの意味は、下記のとおりです。
| オプション | 内容 |
|---|---|
| base | パッケージ化するBoxの名前または、UUIDを指定します。 Vagrant upを実行すると、.vagrant/machines/default/virtualbox/idに起動したBoxのUUIDが記録されますので、記録されたUUIDを使うと良いでしょう。 |
| output | パッケージ化したBoxの出力ファイル名を指定します。 |
$ cat .vagrant/machines/default/virtualbox/id
e7c42c6f-a4c6-4901-ba75-3167f5de7de2
punio@PAPA /tmp/test-box
$ vagrant package --base `cat .vagrant/machines/default/virtualbox/id` --output d:/temp/test-box2.box
[e7c42c6f-a4c6-4901-ba75-3167f5de7de2] Clearing any previously set forwarded ports...
[e7c42c6f-a4c6-4901-ba75-3167f5de7de2] Creating temporary directory for export...
[e7c42c6f-a4c6-4901-ba75-3167f5de7de2] Exporting VM...
[e7c42c6f-a4c6-4901-ba75-3167f5de7de2] Compressing package to: d:/temp/test-box2.box
作成したBoxを起動します。
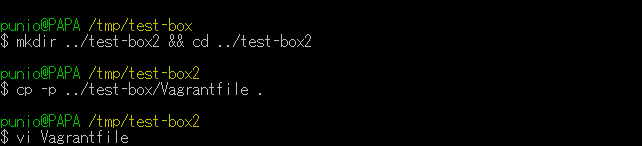
今回は、先程起動したBoxのVagrantfileを元に設定を行います。
$ mkdir ../test-box2 && cd ../test-box2
$ cp -p ../test-box/Vagrantfile .
$ vi Vagrantfile
ホストOSからカスタムBoxのウエブサーバーにアクセスするため、11行目にブリッジネットワークを追加設定しています。
VAGRANTFILE_API_VERSION = "2"

Vagrant.configure(VAGRANTFILE_API_VERSION) do |config|
  # BOX名
  config.vm.box = "test-box2"

  # BOXのダウンロードURL
  config.vm.box_url = "file://d:/temp/test-box2.box"

  # ブリッジネットワークの指定
  config.vm.network :public_network
end
$ vagrant up
$ vagrant ssh
起動すると、22行目でブリッジネットワークが追加されたことが確認できます。
Bringing machine 'default' up with 'virtualbox' provider...
[default] Box 'test-box2' was not found. Fetching box from specified URL for
the provider 'virtualbox'. Note that if the URL does not have
a box for this provider, you should interrupt Vagrant now and add
the box yourself. Otherwise Vagrant will attempt to download the
full box prior to discovering this error.
Downloading or copying the box...
Extracting box...ate: 66.5M/s, Estimated time remaining: --:--:--)
Successfully added box 'test-box2' with provider 'virtualbox'!
[default] Importing base box 'test-box2'...
[default] Matching MAC address for NAT networking...
[default] Setting the name of the VM...
[default] Clearing any previously set forwarded ports...
[default] Creating shared folders metadata...
[default] Clearing any previously set network interfaces...
[default] Preparing network interfaces based on configuration...
[default] Forwarding ports...
[default] -- 22 => 2222 (adapter 1)
[default] Booting VM...
[default] Waiting for VM to boot. This can take a few minutes.
[default] VM booted and ready for use!
[default] Configuring and enabling network interfaces...
[default] Mounting shared folders...
[default] -- /vagrant

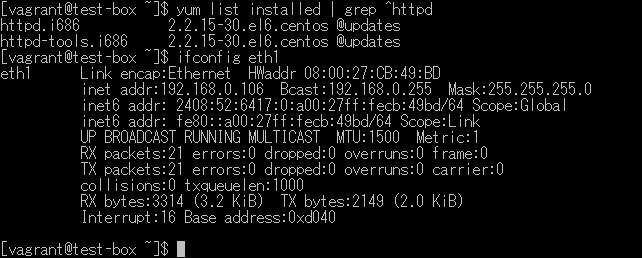
カスタムBoxが起動しましたので、ホスト名や追加したパッケージを確認し、最後にホストOS側からブラウザでアクセスします。
$ yum list installed | grep ^httpd
$ ifconfig eth1
6行目で、パブリックネットワークに割り当てられたIPアドレスが確認できます。
[vagrant@test-box ~]$ yum list installed | grep ^httpd
httpd.i686           2.2.15-30.el6.centos @updates
httpd-tools.i686     2.2.15-30.el6.centos @updates
[vagrant@test-box ~]$ ifconfig eth1
eth1      Link encap:Ethernet  HWaddr 08:00:27:CB:49:BD
          inet addr:192.168.0.106  Bcast:192.168.0.255  Mask:255.255.255.0
          inet6 addr: 2408:52:6417:0:a00:27ff:fecb:49bd/64 Scope:Global
          inet6 addr: fe80::a00:27ff:fecb:49bd/64 Scope:Link
          UP BROADCAST RUNNING MULTICAST  MTU:1500  Metric:1
          RX packets:21 errors:0 dropped:0 overruns:0 frame:0
          TX packets:21 errors:0 dropped:0 overruns:0 carrier:0
          collisions:0 txqueuelen:1000
          RX bytes:3314 (3.2 KiB)  TX bytes:2149 (2.0 KiB)
          Interrupt:16 Base address:0xd040
最後に、ブラウザでカスタムBoxにアクセスします。
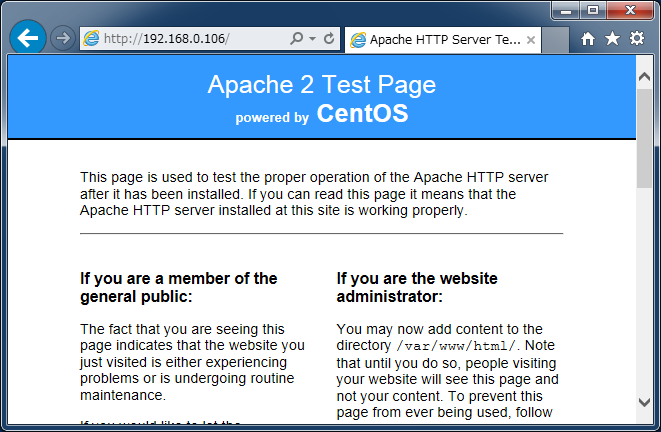
以上で、カスタムBoxがパッケージ化され、正しく動作していることが確認できました。